Inquiry
Form loading...

How to Choose Building Plywood for Your Project?

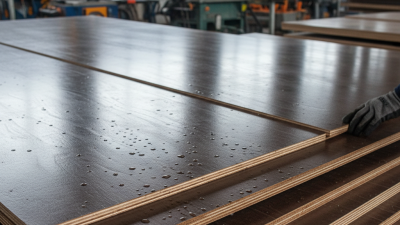
Choosing Building Plywood is not simply a matter of selecting the thickest sheet. The correct panel must match the project’s loads, moisture exposure, span, and installation conditions. A roof deck, concrete form, workshop wall, and interior cabinet require different performance characteristics. A sheet stacked in a damp yard may already show edge swelling, even when its surface looks acceptable.

The USDA Forest Products Laboratory’s Wood Handbook explains that plywood performance depends on veneer species, grain direction, adhesive bonding, and panel construction. These details affect stiffness, dimensional stability, and resistance to splitting. APA—The Engineered Wood Association also emphasizes grade stamps, span ratings, and exposure classifications in its structural panel guidance. Look for markings such as Structural I, Exposure 1, or Exterior, rather than relying on appearance alone. PS 1 and PS 2 standards provide useful benchmarks for manufacturing quality and structural performance. However, labels can be misunderstood.

A practical inspection still matters. Check corners for crushing, face veneers for open knots, and edges for delamination. Measure the sheet before cutting. Small defects become expensive when joists are widely spaced or fasteners sit near an edge. Project specifications, local building codes, and the engineer’s design should control the final choice. Reports and standards offer reliable direction, but they cannot see your jobsite.

This guide compares plywood grades, thicknesses, cores, and exposure ratings. It also considers cost, waste, transport, and long-term maintenance. One caution remains: supplier descriptions are not always consistent. Verify certification and documentation before ordering.
How to Choose Building Plywood for Your Project?

Define Project Requirements and Plywood Performance Needs

Choosing building plywood starts with the project, not the sheet price. Define where the panel will go, how it will be loaded, and how long it must perform. A roof deck faces different demands from indoor shelving. Write these requirements down.

Moisture exposure deserves careful attention. A dry interior may need standard interior-grade plywood. Bathrooms, kitchens, exterior walls, and temporary site structures require stronger moisture resistance. Check the panel’s intended exposure rating and installation guidance. Do not treat “water-resistant” as permanently waterproof. That assumption can become expensive.

Panel thickness should match the support spacing and expected load. Measure the joist or stud gaps before ordering. For flooring, stiffness and surface durability matter more than appearance alone. For cabinets, a stable face and clean edges may matter most.

Inspect several sheets for warping, open gaps, damaged veneers, and uneven edges. I once accepted slightly bowed panels to save time. Installation became slower, and the finished surface was less accurate.

Also consider fastener holding, cutting waste, weight, and indoor air requirements. A heavier panel may improve strength but complicate overhead work. Confirm that the plywood meets applicable construction standards for its use. Ask for technical documentation when performance affects safety.

Grades and ratings can be confusing, even for experienced buyers. Record the selected thickness, grade, exposure class, and support spacing before work begins. That small record can prevent a costly misunderstanding.
Compare Plywood Grades, Types, and Core Constructions

How to Choose Building Plywood for Your Project?

Compare Plywood Grades, Types, and Core Constructions

Choosing plywood starts with the project’s location, load, and finish requirements. Interior cabinets usually need smooth, sanded panels with clean face grades. Construction walls and roof sheathing require structural plywood rated for the expected exposure. Read the stamp. It often identifies thickness, grade, span rating, and exposure classification. A higher face grade improves appearance, but it does not automatically provide greater strength.

Plywood grades commonly use letters from A to D. Grade A faces have fewer visible defects, while Grade C or D faces may contain knots and repaired splits. Hardwood plywood suits furniture and visible interiors. Softwood structural plywood handles framing, subfloors, and roof work. Marine plywood can resist moisture better, but it is not a substitute for proper sealing or drainage. That mistake is common.

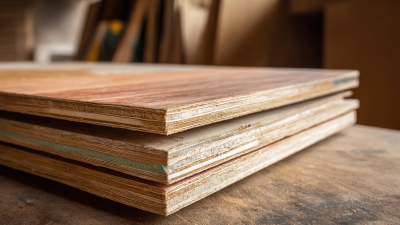
Core construction affects stability and screw-holding performance. Veneer-core plywood uses layered wood veneers, giving it reliable strength and lighter weight. MDF-core panels offer very smooth surfaces, yet their edges can swell when exposed to water. Particleboard-core sheets are economical but may hold screws less securely after repeated removal. Inspect the edges before buying. Look for gaps, loose plies, bubbling, or delamination. I once accepted a slightly warped sheet because the face looked excellent; installation took longer than expected. Store panels flat, keep them off concrete, and allow them to adjust to the site before cutting.

Select the Right Thickness, Size, and Panel Dimensions

Choosing building plywood starts with the load, span, and working conditions, not the lowest shelf price. For floor work, 18–19 mm panels often provide a firmer walking surface than thinner sheets. Wall lining may need 9–12 mm, while roof sheathing commonly uses 12–15 mm. Local codes and framing distances still control the final choice. Measure the joists or studs carefully. A panel that overhangs too far can flex, split, or absorb water along its edge. I check the required thickness, structural rating, and exposure classification before ordering.

Standard panels often measure 1220 × 2440 mm, but actual dimensions can vary slightly. Longer sheets may reduce seams, yet they are harder to carry through narrow stairways. Plan cuts around door openings, corners, and support points. Keep the face grain aligned with the main span when the panel’s grading requires it. Leave small expansion gaps between sheets, especially in damp areas. I once ordered full-size panels for a cramped renovation and created unnecessary waste. Smaller panel dimensions would have saved time. That mistake still influences my measurements. Check every edge for damage, confirm the printed grade, and keep panels flat and dry before installation.

Check Moisture Resistance, Surface Quality, and Safety Standards

How to Choose Building Plywood for Your Project?

Choosing building plywood starts with moisture exposure, not appearance alone. For bathrooms, kitchens, roofs, or exterior walls, select panels rated for the expected conditions. Check the technical sheet for water resistance, bonding type, and allowable exposure time.

A water-resistant panel is not automatically waterproof. That distinction matters. I have seen unsealed edges swell after one rainy weekend. Seal cut edges where the installation details require it.

Surface quality also affects installation and finishing. Inspect several sheets under angled light before buying. Look for open knots, core gaps, delamination, warping, and rough patches. Minor marks may be acceptable for hidden framing, but they can remain visible under paint or laminate.

A flat sheet saves time during fitting. Check the edges, too. Uneven layers can signal weak construction or poor storage.

Safety documentation deserves careful attention. Confirm the plywood’s structural grade, thickness tolerance, and suitability for its intended use. Review formaldehyde emission information and compliance documents required in your region. Ask for test reports that are traceable to current safety standards.

Do not rely on a stamp without reading its meaning. I once focused too much on price and overlooked storage damage. The cheaper sheets required extra cutting and produced more waste. Recheck the panels after delivery, because transport and damp warehouses can change their condition.

Estimate Quantities, Costs, and Installation Requirements

How to Choose Building Plywood for Your Project?

Estimate the surface area before choosing plywood. Measure each wall, floor, or roof section separately. Multiply length by width, then subtract large openings. Divide the result by one sheet’s coverage area. Add 10% for cutting waste, damaged edges, and mistakes. Complex layouts may require 15%. This estimate is not perfect.

Select thickness according to span, load, moisture exposure, and local building requirements. Structural plywood is usually suitable for load-bearing work, while interior-grade panels may fail in damp areas. Check the panel’s grading, thickness, and intended use on its documentation.

A 1,220-by-2,440-millimeter sheet covers about 2.98 square meters. Keep measurements consistent.

Calculate the full cost, not only the sheet price. Include fasteners, adhesive, delivery, protective coating, equipment rental, and labor. Installation requirements can change the budget quickly.

Panels may need acclimation before installation, especially indoors. Leave small expansion gaps between sheets. Support edges properly, align joints over framing, and stagger seams where practical.

Use corrosion-resistant fasteners in humid locations. Wear eye protection when cutting.

I once underestimated openings and ordered too many sheets. Review the plan twice. Confirm joist spacing, screw spacing, and moisture protection with current local codes or a qualified building professional before installation.